Using LUA with C++
原文鏈接:http://www.spheregames.com/index.php?p=templates/pages/tutorials
作者:http://www.spheregames.com
翻譯:飄飄白云(http://www.shnenglu.com/kesalin )
譯注:翻譯本文并未獲得原作者的許可,翻譯本文來僅供個人學習消遣,故謝卻轉載。
原文中的示例代碼汲取了《游戲編程精粹 5》中Matthew Harmon寫的 “Building LUA into Games”一文的想法與部分代碼實現,我將“Building LUA into Games”一文的示例代碼應用到最新的LUA版本,也打包貼在這里,供大家參考。
Using LUA with C++:示例代碼下載
Building LUA into Games:示例代碼下載
《游戲編程精粹 6》中有一篇有關LUA結合C++使用的文章,下回整理下也貼出來。
---------------------------------------------------------------------------------------------
到目前為止我知道有好幾個教人們如何將LUA與C++結合起來進行游戲開發的教程,但是我注意到很多教程只不過是一個簡要概述和一些不很容易讓人明白的示例代碼。我這個教程的目的是想描述SGE(Sphere Games Engine)中的LUA實現。這個C++實現可以讓你很快也很容易地將其他類轉變成腳本兼容類(譯注:可以與Lua腳本交互的類)。
About the Demo
開發環境:MS Visual Studio 2003, DirectX SDK 2005 December版本,LUA 5.02
基礎知識
在開始之前讓我們做些下必要的準備工作:首先去http://www.lua.org下載LUA,我使用的是5.0.2版,同時去http://lua-users.org/wiki/SimplerCppBinding 拷貝和粘貼聲稱luna for Lua 5.0的代碼,并保存到命名為luna.h的文件中,這樣就很容易與C++綁定(這個文件已經包含在示例代碼中了)。
下一步添加LUA文件到你的工程中。我不會詳說這個,看看示例工程看是如何這些文件是如何添加的。值得一說的是你應該將LUA/include添加到你工程設置(project’s settings)的額外包含路徑中(additional include directory)去,同時添加luna.h到工程中,我們很快就要使用它。
建立工程并添加了相關文件,而且編譯也通過了,那我們就可以正式開始了。
宏
這個例程使用很多宏來簡化客戶類與LUA的整合工作,第一次看上去這些宏有點讓人頭大,不過好消息是即使你不明白這些宏是如何運行的,你還是能夠很容易地使用它們來。當然我相信學習這些宏是如何運作的是很有好處的,無論喜歡與否,它們遲早有用。
我們從創建一個名為sgLUA.h的文件開始,并添加通用預處理語句以及包含LUA與LUNA頭文件:
1 #pragma once
2
3#ifndef SGLUA_H_
4#define SGLUA_H_
5
6
7
 extern "C"
  {
{
8 #include "lua.h"
9#include "lauxlib.h"
10#include "lualib.h"
11 }
}
12
13#include "./luna/luna.h"
我們最先看的這個宏DECLARE_SCRIPT_CLASS是你在聲明一個類的時候使用的(頭文件中),它添加兩個靜態成員變量到你的類中,一個是持有類名字的string,另一個是一個methods array,持有所有與LUA綁定的函數。下面是這個宏的代碼實現:
1#define DECLARE_SCRIPT_CLASS(ClassName) \
2 public: \
3 static const char className[]; \
4 static Luna<ClassName>::RegType methods[];
5
接著的這一個宏是在你所聲明的類的實現文件中使用的,在后面我們講看到它如何被使用的,這個宏只是初始化類的名字。
1#define IMPLEMENT_SCRIPT_CLASS(ClassName) \
2 const char ClassName::className[] = #ClassName;
接著的三個宏是連接在一起使用的,它們被用來指定哪些個成員函數將被當作LUA的綁定函數。
1#define DEFINE_SCRIPT_CLASS(ClassName) \
2 Luna<ClassName>::RegType ClassName::methods[] = {
3
4#define SCRIPT_METHOD(ClassName, MethodName) { #MethodName, &ClassName::MethodName }
5
6#define END_SCRIPT_CLASS };
如果這些宏讓你看的頭大,當你看到它們是如何被使用的時候就會輕松很多,它們只不過是初始化先前使用DECLARE_SCRIPT_CLASS宏聲明的methods array。
1#define REGISTER_CLASS(ClassName) \
2 Luna<ClassName>::Register(m_pLuaState);
這個宏很重要,它通過luna將C++類綁定到LUA中,先看代碼吧,在后面我們講談論如何使用它。
這就是我們所需要的所有宏,當然,有些人喜歡添加一個像下面一樣的額外的宏:
#define SCRIPT_FUNCTION(FunctionName) int32 FunctionName(luaState* L);
他們使用這個宏來定義在LUA中調用的類成員函數,通過這種方法你可以很清晰的看明白哪些成員函數是被腳本使用的,哪些不是。如果你喜歡你也可以這么做,這只是個人喜好而已,我個人并不使用它,但是我會在后面講述如何使用這個宏來滿足下你的獵奇心。
腳本引擎
現在我們來討論腳本是如何被裝載,執行與移除。這里的代碼是基于Matthew Harmon發表在《Game Programming Gems 5》上“Building LUA into Games”一文,為了清晰起見,我在這里做了一些簡化工作,但我建議你看看Matthew那篇精華文章以及在這里被簡化的特征。
腳本引擎是一個單例(singleton)(參看附錄1:單例實現),它被用來創建腳本,無論腳本在什么時候被創建,腳本都會被添加到鏈接列表(linked list)中,這樣腳本引擎就可以通過這個鏈接列表更新每一幀。
既然腳本引擎管理一個腳本鏈接表,我們將在腳本引擎上下文中討論腳本。
腳本
每個腳本在裝載之后將創建它自己的LUA thread(譯注:這里的thread與操作系統的進程概念不同,LUA中的thread是指攜同作業吧。),裝載了腳本文件之后,腳本就會被立即執行,直到腳本執行結束。通過使用循環腳本也可以被無限執行,在后面我們將看到這是如何被實現而不會讓LUA虛擬機在無限循環中僵住。
你可以通過下面的代碼創建一個腳本:
Script* pScript = GetScriptEngine().Create();
pScript->RunFile("scanner.lua");
調用腳本引擎的創建函數,腳本引擎將返回一個腳本(這個腳本也被添加到腳本的引擎的腳本鏈接表中),腳本會創建一個LUA thread并開始執行。
雖然腳本會持續執行,但有一種機制可以推遲腳本的執行,這需要在創建腳本引擎初始化LUA的時候添加一個庫函數。在這個例子中你可以在LUASystem.h/cpp文件中找到這個庫。
系統庫
我們稍稍繞開下先來解釋下這個庫以及它能做什么。目前的這個系統庫只包含四個函數,它們都是用來綁定到LUA的靜態函數。
// LUASystem.h
1#pragma once
2
3#include "sgLUA.h"
4
5// This is the LUA system lib
6
7// this is the array where the functions are mapped to LUA
8extern const luaL_reg systemLib[];
9
10// this is used to initialize the lib
11int LUAOpenSystemLib(lua_State* L);
12
13// These are the actual functions that will be bound
14static int LUAWaitframe(lua_State* l);
15static int LUAWaittime (lua_State* l);
16static int LUAWait (lua_State* l);
17static int LUAGetTime (lua_State* L);
// LUASystem.cpp
1
2 // I'm including windows.h just for timeGetTime, ideally you'd have
3
4// your own timing mechanism
5#include <windows.h>
6
7#include "LUASystem.h"
8#include "../Script.h"
9
10// map the functions to their script equivalents
11static const luaL_reg systemLib[] = {
12
 { "waitframe", LUAWaitframe },
13 { "waittime", LUAWaittime },
14 { "wait", LUAWait },
15 { "time", LUAGetTime },
16 { NULL, NULL }
17};
18
19// This is used by the script engine to load this library
20int LUAOpenSystemLib(lua_State* L)
21{
22 luaL_openlib(L, "system", systemLib, 0);
23 return 0;
24}
25
26// This forces the script to halt execution for the specified
27// number of frames
28static int LUAWaitframe(lua_State* L)
29{
30 Script* pScript = 0;
31
32 pScript = GetScriptObject(L);
33
34 pScript->m_WaitFrame = (int)luaL_checknumber(L, 1);
35 pScript->m_State = Script::SS_WAITFRAME;
36
37 return(lua_yield(L, 1));
38}
39
40// This returns the current time in seconds to the script
41static int LUAGetTime(lua_State* L)
42{
43 float current_time = timeGetTime() / 1000.0f;
44 lua_pushnumber(L, current_time);
45 return 1;
46}
47
我在這里沒有列出LUAWaittime與LUAWait這兩個函數,因為它們和LUAWaitFrame非常相似,再在這里列出只會浪費紙張與看官你寶貴的精力。頭文件非常直觀,所以我不打算談論它。有趣的是實現文件,我們從將腳本函數映射到靜態C函數開始,這個映射過程是通過一個叫systemlib的函數名字數組實現的。腳本引擎將在后面調用LUAOpenSystemLib,解析這個數組并在LUA與我們的代碼之間創建實際的映射。
我在先前的類實現代碼塊中包含了處理不同事情的兩個函數,它們相當有用。第一個函數:LUAWaitFrame,通過調用GetScriptObject得到當前正在執行的腳本,提取從腳本文件中傳過來的第一個參數“waitframe”然后將它設置到我們的腳本對象中,然后改變腳本對象的狀態為SS_WAITFRAME,這樣這個腳本會在接著的指定幀數里暫停執行。在LUA中,可以通過像下面的代碼使用:
|
–- This script will halt executing at this point for 5 frames
system.waitframe(5)
|
現在我要解釋的下一個函數是LUAGetTime,這個函數實際上返回一個值到LUA腳本中,在這里它返回系統時間(以秒為單位),實際上它可以返回任何你需要的任何值或對象。下面是LUA中的使用示例:
|
-- the t variable will contain the system time in seconds
local t = system.time()
|
我發現通過將綁定靜態函數到LUA中從而在LUA和腳本引擎之間使用庫的方式工作得相當好。我將不會在游戲真實代碼中這樣使用,我更愿意使用一個類,就像在這個教程開始時討論的那樣。
腳本引擎
腳本引擎不是一個復雜的系統,簡言之,它只是讓你可以從鏈接列表中取得一個腳本對象,并且每一幀都通過迭代器遍歷這個鏈接列表,調用腳本對象的更新函數。
腳本引擎創建之后就立即裝載基本的LUA庫。在這里我裝載了全部的LUA庫,實際上你可能不需要全部的庫,并想減少內存使用,那你可以移除那些不需要的庫。
1// Add any LUA libraries that need to be loaded here, this
2// may include user created libs
3static const luaL_reg lualibs[] =
4{
5 {"math", luaopen_math},
6 {"str", luaopen_string},
7 {"io", luaopen_io},
8 {"tab", luaopen_table},
9 {"db", luaopen_debug},
10 {"base", luaopen_base},
11 {"system", LUAOpenSystemLib},
12 { NULL, NULL }
13};
14
15// This opens all the LUA libraries declared above
16void OpenLUALibs(lua_State *l)
17{
18 const luaL_reg *lib;
19
20 for (lib = lualibs; lib->func != NULL; lib++)
21 {
22 lib->func(l);
23 lua_settop(l, 0);
24 }
}
25}
26
任何你想要裝載的LUA庫必須在追加到這個數組里面來,比如最后一個入口:“system”,那是我們的系統庫,LUAOpenSystemLib是我們在LUASystem.cpp中追加的用來裝載system library的函數。
在裝載了所有庫之后,我們調用RegisterScriptClasses,這非常重要,以為在這里我們通過宏REGISTER_CLASS將我們的LUA腳本兼容類注冊到(或綁定到)LUA中。因為這個函數非常非常的重要,為了避免在大堆代碼中迷失方向,我把相關代碼都列在它自己的CPP文件LUARegistry.cpp中。完整代碼參看下面:
1#include "../ScriptEngine.h"
2#include "../sgLUA.h"
3
4// Any classes that are exposed to LUA must be registered in this file.
5// Failure to register a class will result in a LUA error such as this one:
6//
7// attempt to call global `ClassName' (a nil value)
8//
9
10#include "../Entity.h"
11
12void ScriptEngine::RegisterScriptClasses()
13{
14 REGISTER_CLASS(Entity);
15}
確保任何與LUA腳本兼容的類都會在這個文件中通過REGSITER_CLASS注冊到LUA中是相當重要的。比如:要用LUA創建一個叫Vehicle的類,那么你應當在LUARegistry.cpp文件中為Vehicle類添加頭文件并在最后一個REGISTER_CLASS之后追加語句REGISTER_CLASS(Vehicle),從而將Vehicle注冊到LUA中去。
很容易忘記注冊你的類,因此如果你得到腳本錯誤信息,就像在注釋中描述的那樣,那你的檢查下看你是否注冊了你的類。
將所有東西整合起來
如果你像我一樣的話,你大概會在看到上面說的這些是如何被使用之后更容易理解一些。因此我將解釋我是如何使用LUA來控制例程中非常簡單的實例。
這是例程的目標:
-允許在LUA腳本中創建實體
-可以在LUA腳本中實現實體的移動,縮放,旋轉
-從實體發送信息到執行中的腳本
這些都是非常適當的目標,它實現了創建可從LUA中訪問的更加復雜的類的所需功能。
為了實現第一個目標,我們需要一個entity管理器,這個管理器將包含一個entity列表,并持續更新它們。當新實體被創建之后,新實體會自動被entity管理器處理,知道實體被銷毀。下面是一個簡單的entity管理器的頭文件:
1#pragma once
2
3// This class detects when an entity is spawned and adds it to
4// a list of entities. The list of entities is processed each
5// frame and each entity is updated and rendered.
6// Entities get added into the manager upon creation, so you
7// don't need to manually do this.
8
9#include <vector>
10#include "Singleton.h"
11#include "Common/dxstdafx.h"
12
13class Entity;
14
15class EntityManager : public Singleton<EntityManager>
16{
17 std::vector<Entity*> m_Entities;
18
19 IDirect3DDevice9* m_pDevice;
20
21public:
22 EntityManager();
23 ~EntityManager();
24
25 void AddEntity(Entity* pEntity);
26
27 void UpdateAll();
28
29};
30
31extern EntityManager* gEntityMngr;
32extern EntityManager& GetEntityManager();
33extern void ReleaseEntityManager();
這個entity管理器是一個單例實現,它所做的事情就是檢測實例的創建并追加到實例列表中,然后每一幀都遍歷所有的實例,調用相應的更新函數。
AddEntity被entity的構造函數所調用,這樣就保證所有的被創建實例都會被entity管理器所管理。
下面讓我們看看實體類的聲明:
1#pragma once
2
3#include "Common/dxstdafx.h"
4#include "../sgLUA.h"
5
6class Entity
7{
8 DECLARE_SCRIPT_CLASS(Entity)
9
10 CDXUTMeshFile* m_pMesh;
11
12 D3DXVECTOR3 m_vRotationAxis;
13 float m_fAngle;
14
15 D3DXVECTOR3 m_vPosition;
16 D3DXVECTOR3 m_vScale;
17
18 DWORD m_dwNumMaterials;
19
20 // We use this flag to determine if an entity was not instanced
21 // through LUA, in this case we need to call delete for this entity
22 bool m_bDelete;
23
24public:
25
26 Entity();
27 Entity(lua_State* L);
28 virtual ~Entity(void);
29
30 bool MustDelete() const { return m_bDelete; }
31
32 HRESULT Spawn(const char* pFilename);
33
34 void SetPosition(const D3DXVECTOR3& pos);
35 void SetScale(const D3DXVECTOR3& pos);
36
37 void Update(float fElapsed = 0.0f);
38 void Render();
39
40 // Script Functions
41 int Spawn(lua_State* L);
42 int SetPosition(lua_State* L);
43 int SetScale(lua_State* L);
44 int Rotate(lua_State* L);
45 int GetAngle(lua_State* L);
46 // End Script Functions
47
48private:
49
50 HRESULT LoadMesh(WCHAR* strFileName);
51
52};
53
OK,這個類有一點有趣的地方,值得一看的地方是:我們聲明這個類被當作一個腳本類:
|
DECLARE_SCRIPT_CLASS(Entity)
|
這意味著我們需要一個供LUA使用的構造函數:
最后,我們聲明一些腳本函數:(譯注:腳本函數就是從LUA腳本中獲得輸入參數,然后將LUA數值類型轉換成C++數值類型,再傳到LUA腳本中去的函數)
1 // Script Functions
2 int Spawn(lua_State* L);
3 int SetPosition(lua_State* L);
4 int SetScale(lua_State* L);
5 int Rotate(lua_State* L);
6 int GetAngle(lua_State* L);
7 // End Script Functions
還記得我前面說有些人喜歡用宏來聲明腳本函數么?就是在這里使用那些宏,就像如下:
|
SCRIPT_FUNCTION(Spawn);
SCRIPT_FUNCTION(SetPosition);
SCRIPT_FUNCTION(SetScale);
SCRIPT_FUNCTION(Rotate);
|
你可以根據你的喜好來決定使用那種方式聲明,只不過是要記得保持前后一致。
當你閱讀這個類的時候也許你會有疑問m_bDelete這個標志是做什么的呢?當我創建這個類的時候,我決定我要從腳本中創建entity對象們,然而,它們有時候可能會在(C/C++)代碼被創建。這里會有點小問題,因為在腳本中創建的實體可能會被LUA的垃圾回收機制給銷毀掉,而在代碼中創建的實體則不會。因此我需要一個標志來標識哪個實體不是由腳本創建的,從而我可以在實體管理器銷毀的時候刪除這些實體。
讓我們來看一下entity的構造函數:
1// LUA will use this constructor to instance an object of this class
2Entity::Entity(lua_State* L)
3: m_pMesh(0)
4, m_bDelete(false)
5, m_fAngle(0.0f)
6{
7 // Add this entity into the entity manager
8 GetEntityManager().AddEntity(this);
9
10 m_vPosition = D3DXVECTOR3(0.0f, 0.0f, 0.0f);
11 m_vScale = D3DXVECTOR3(1.0f, 1.0f, 1.0f);
12}
這是一個LUA構造函數,m_bDelete被設置成false,因為這個實例對象會被LUA的垃圾回收機制自動回收。在這個構造函數里,首先我們將“this”添加到entity管理器中,這樣就保證這個實體每幀都會被更新與描繪。在LUA腳本中是這樣來創建實體對象的:
在這里創建并調用實體類的構造函數,就像我們看到的那樣,將會把創建的實體添加到實體管理器中。
下面讓我們來看一下我們的第一個腳本函數Spawn:
1// Spawn receives a .X file name to load a mesh
2//
3// Ex: tiger:Spawn("tiger.x")
4//
5int Entity::Spawn(lua_State* L)
6{
7 const char* pFilename = lua_tostring(L, 1);
8
9 HRESULT hr = Spawn( pFilename );
10
11 if ( FAILED(hr) )
12 return -1;
13
14 return 0;
15}
Spawn將會裝載實體的模型與紋理,值得注意的是我們如何從LUA中取得函數參數,來看第一行:
1
const char* pFilename = lua_tostring(L, 1);
lua_tostring(L, 1)將把在spawn函數里傳遞的第一個參數當作string返回,請查看下LUA的reference manual了解更多有關參數傳遞的信息。
這樣,在腳本中你可以像下面這樣地來使用
|
tiger:Spawn("tiger\\tiger.x)
|
這樣就創建了實體,并保證實體會被追加到實體管理器中,而實體管理器將會在每一幀更新與描繪所有實體。萬事OK了,你現在就可以創建被LUA腳本使用的腳本兼容類了!
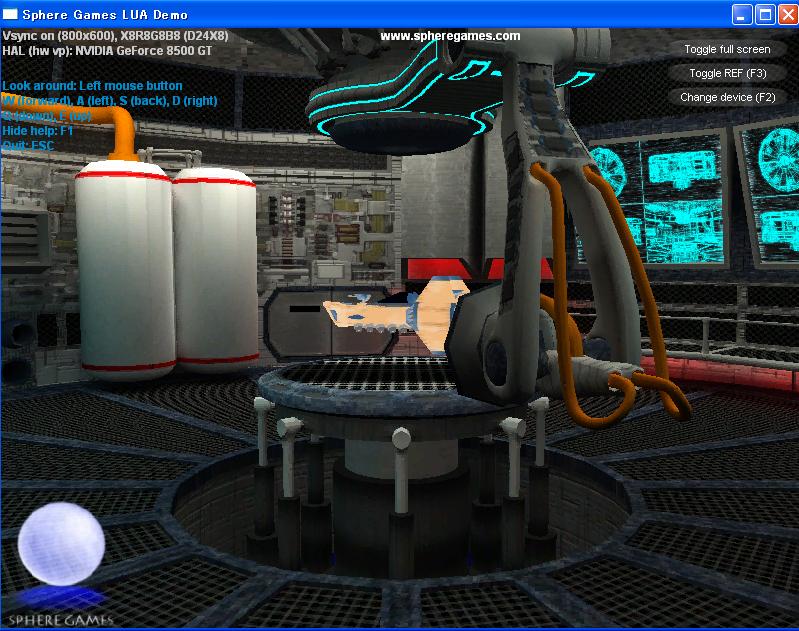
在這個截圖中你可以看到scanner(掃描器)的臂繞懸掛在中央的調速器(speeder)旋轉,調速器同時也在自轉,并且有輕微的上下移動來模擬震動。所有的這些,包括所有的模型的產生都是在這兩個腳本中實現的:scanner.lua和speeder.lua。
Scanner.lua-構建房子并使臂繞Y軸旋轉,你可以打開這個腳本,放開被注釋掉的兩行,這樣就可以使整個房間緩慢地旋轉,值得一試!
Speeder.lua-構建調速器,并輕微地縮放,然后使它旋轉,同時輕微的上下移動,就像它在搖擺一樣。
玩轉腳本吧,你就可以看到只要向腳本展露很少一些函數你就可以做完成很多事情!
附錄1- Singleton
在這個附錄里,我將講述一點如何來使用singleton類。我只會講述如何來使用這個類而不會講述太多的內部實現過程,因為有太多的出色的設計模式資源在講解singleton。這個類相當直觀:
1/**//////////////////////////////////////////////////////////// 2//
3// File..: sgSingleton.h
4// Author: Luis Sempe
5// Created on..: Sunday, July 13, 2003
6//
7// Sphere Games Copyright (C) 2003
8// All rights reserved.
9//
10// C O N F I D E N T I A L
11//
12/**////////////////////////////////////////////////////////////13#ifndef SGSINGLETON_H_
14 #define SGSINGLETON_H_
15
16 #include <cassert>
17
18/**//*
19Example usage:
20
21class StateManager : public Singleton <StateManager>
22{
23//
24State* GetState() { return &State; }
25}
26
27State = StateManager::Get()->GetState();
28
29Also, it's possible to do:
30
31#define STATEMANAGER (StateManager::Get())
32
33and then reference the statemanager like this:
34
35STATEMANAGER->GetState();
36
37Finally, do not forget to create the StateManager as a static global or with new. Either way
38you do it, it has to be done before using StateManager::Get() otherwise, bad things occur.
39*/
40 #pragma warning(push)
41 #pragma warning(disable : 4311) // 'variable' : pointer truncation from 'type' to 'type'
42 #pragma warning(disable : 4312) // 'variable' : conversion from 'type' to 'type' of greater size
43template<typename T>
44class Singleton {
45 static T* m_pInstance;
46public:
47 Singleton() {
48 assert(!m_pInstance);
49 int offset = reinterpret_cast<int> (reinterpret_cast < T * > (0x1)) - reinterpret_cast<int> (reinterpret_cast < Singleton<T> * > (reinterpret_cast < T * > (0x1)));
50 m_pInstance = reinterpret_cast < T * > (reinterpret_cast<int> (this) + offset);
51 }
52 virtual~Singleton()
53 {
54 assert(m_pInstance);
55 m_pInstance = 0;
56 }
57
58 static T& Get()
59 {
60 assert(m_pInstance);
61 return *m_pInstance;
62 }
63
64 static T* GetPtr()
65 {
66 assert(m_pInstance);
67 return m_pInstance;
68 }
69
70private:
71 Singleton(const Singleton& )
72 {
73 }
74
75 Singleton &operator=(const Singleton& )
76 {
77 }
78};
79
80template<typename T>
81T *Singleton<T>::m_pInstance = 0;
82
83 #pragma warning(pop)
84#endif
85
如果你要將某個類當成單一實例類,那就必須讓它繼承自Singleton,并且將那個類設置成Singleton的模板參數,像下面一樣:
|
class MySingleton : public Singleton<MySingleton>
{
// . . .
};
|
因為這個類只允許有一個實例,于是我通過創建一個指向這個類的全局指針來實現。你必須留心你如何使用這個單例實現,因為就像你看到的那樣它沒有太多的錯誤檢測。只用你始終按照它應該被使用的方式來使用它,那你就不會有任何問題。
在頭文件的類聲明之后,我添加了如下代碼:
|
extern MySingleton* gMySingleton;
extern MySingleton& GetMySingleton();
extern void ReleaseMySingleton();
|
gMySingleton是一個指向類實例的全局指針,它唯一的真實目的就是提供初始化實例的途徑。GetMySingleton要注意檢查gMySingleton在返回之前是否已經被初始化了,如果沒有,它將會創建實例(唯一一次),然后返回這個實例的引用。
|
MySingleton* gMySingleton = 0;
MySingleton& GetMySingleton()
{
if ( !gMySingleton )
gMySingleton = new MySingleton();
return MySingleton::Get();
}
void ReleaseMySingleton()
{
if ( gMySingleton )
{
delete gMySingleton;
gMySingleton = 0;
}
}
|
最后,在關閉游戲之前不要忘記調用ReleaseMySingleton()。使用單一實例類有時很棘手,因為你必須確保在使用之前它被創建,并且不能在別處還在使用的場合下釋放它。
這個單一實例類的實現一點也不完美,有很多簡單與復雜的途徑來實現單一實例類。總之,我對我這份單一實例類的實現相當滿意,因為只要你一致地使用,就不會跑出問題來。
引用
Matthew Harmon, “Building LUA into Games” , Game Programming Gems 5
Andrei Alexandrescu, “Implementing Singletons”, Modern C++ Design
http://www.spheregames.com
|
Donations
If you found this tutorial helpful, and would like to see more of them, please donate, even a small contribution helps a lot!
|