好長時間以來,一直都想在網上找一個C風格并且可以與C/C++配合良好的腳本語言。可是無奈,用過很多的腳本,lua,Python、 ruby等等,但總是感覺讓我不是很滿意(自己水平差,沒辦法),除了LUA一直在使用以外,其它腳本都是一看就放棄了。
越來越感覺用lua不順手,它的書寫風格讓我感覺不舒服,可是,功夫不負有心人,7月底的時候,讓我找到了ChaiScript,簡單的看了介紹就趕緊的用了下試試……
由于本人菜鳥,有點發現總是不敢獨享,于是鑒于chaiScript沒有現成的使用文檔,所以就寫了這個破爛文章,僅為幫助像我一樣菜的朋友,故高手略過……
本人也只是簡單的測試和使用了一下,因此很多的東西摸得不是很透,所以,倘若我寫的內容有錯誤或者理解不多的地方,還請各位朋友幫忙指正,以免誤人子弟。
besterChen
2009年7月29日
ChaiScript的正常運行需要有Boost的支持,所以,我們需要先在配置ChaiScript環境之前,安裝和配置好boost庫,下面我將分開介紹boost和ChaiScript的配置。
1、Boost庫的安裝和使用
大家可以官網(http://www.boost.org/)來獲取最新的boost庫代碼及Jam編譯器。
將bjam.exe復制到boost根目錄下:
將命令行也定位boost根目錄下。
編譯時通過設置參數可以指定編譯器和編譯版本以及存放路徑這里沒喲編譯python.
bjam --toolset=msvc-8.0 --prefix=x:\boost stage
這個命令將會生成release版的lib和dll文件
bjam --toolset=msvc-8.0 --prefix=x:\boost debug stage
這個命令將會生成帶gd字符的debug版的lib和dll文件
bjam --tooset=msvc-8.0 --prefix=x:\boost debug runtime-link=static stage
這個命令將會生成帶sgd字符的靜態debug版的lib和dll文件
如果不是用--prefix參數將默認生成在c:\boost目錄下
編譯完成后可以建立一個bat文件自動將生成的lib和dll文件拷貝到lib目錄下面
cplib.bat
dir /W/S/B *vc80*.lib,*vc80*.dll >liblist
if exist lib (echo exist lib fold) else (mkdir lib)
for /f %%x in (liblist) do @copy "%%x" lib\
拷貝之后可以做一下清理工作,同個建立一個bat文件來自動清理編譯過程產生的.obj文件
delobj.bat
del /s/q *.obj
將這兩個文件放在x:\boost目錄下執行就可以了。
配置環境變量
Tools -> Options -> Projects and Solutions -> VC++ Directories 在Library files加上x:\boost\lib
在Include files加上x:\boos
測試程序:
#include <iostream>
#include <string>
#include <boost/algorithm/string.hpp>
#include <boost/algorithm/string_regex.hpp>
using namespace std;
using namespace boost;
int main()
{
string s = " Hello boost!! ";
trim(s);
cout << s << endl;
getchar();
std::string regstr = "a+";
boost::regex expression(regstr);
std::string testString = "aaa";
// 匹配至少一個a
if( boost::regex_match(testString, expression) )
{
std::cout<< "Match" << std::endl;
}
else
{
std::cout<< "Not Match" << std::endl;
}
}
說明:本庫的配置方法引用與http://paul216.blog.hexun.com/29507251_d.html
2、ChaiScript運行環境的配置。
ChaiScript的使用方法比較簡單,只要在IDE中配置一下包含目錄就可以了。
首先,我們從我們下載回來的文件中把Include拷貝到指定的一個庫文件夾中,比如我的目錄是:D:\OtherLib\ChaiScript,如下圖:
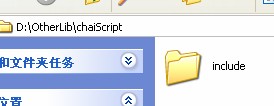
然后在VC環境中點擊:
Tools -> Options -> Projects and Solutions -> VC++ Directories 在Include files加上D:\OtherLib\ChaiScript\Include
這樣我們就可以開始寫可以嵌ChaiScript的程序了。
關于ChaiScript的基礎語法講解并不像如何使用ChaiScript那樣模糊,在官網上已經講的很詳盡清楚了,只不過是英文版本,我就簡單的翻譯一下,我盡量建議大家看英文版本,因為我的英文水平我自己都不放心……
1、 條件模塊(if)
ChaiScript支持If語句,但是需要說明:"else if"是一個單獨的關鍵字而不是兩個分開的關鍵字。大概的用法格式如下:
var i = 2
if (i < 2)
{
print("less than 2")
}
else if (i == 2)
{
print("equal to 2")
}
else
{
print("more than 2")
}
2、 循環語句
ChaiScript跟C + +的循環風格差不多有兩種:for循環和while循環。大概的用法如下:
1) For 循環:
for (var i = 0; i < 10; ++i)
{
print("i: " + i.to_string())
}
2) While 循環:
var i = 0
while (i < 10)
{
print("i: " + i.to_string())
++i
}
說明:跟C++一樣,在ChaiScript中也可以使用break關鍵字來中斷循環。
3、 容器(Vectors、Maps)
ChaiScript支持少數容器類型,也允許用簡捷的寫法創建Vectors和Maps。比如:
1) Vectors:
var x = [1, 2, 3]
print(x[1])
2) Maps:
var x = ["bob":1, "fred":2]
print(x["fred"])
同樣,我們也可以通過一個值的范圍來快速的創建Vector容器,例如:
var x = [1..10]
print(x)
4、 函數
在ChaiScript中定義函數有兩種書寫方法。
1) 使用“def”關鍵字定義靜態函數,在全局范圍內都可見。比如:
def add_elems(x, y)
{
x + y
}
print(add_elems(5, 10))
2) 創建一個匿名函數,通常賦值給一個變量來使用。
var add_elems = fun(x, y) { x + y }
print(add_elems(5, 10))
5、 返回值
函數的返回值也可以有兩種寫法。
一種是跟C++一樣,明確的使用關鍵字”return”返回,用法跟C++一樣,例如:
def five()
{
return 5
}
print(five())
另一種是隱式的返回函數結果,就是當一個函數沒有明確的使用return語句返回時,最后的這個數值就作為函數的返回值,比如:
def five()
{
5
}
print(five())
這樣定義函數的返回值與上一種寫法是一樣的。
6、 方法(Methods)
其實ChaiScript并不支持什么方法,只是利用了函數的一個被叫作“syntactic sugar”的技術代替的方法。例如:
5.to_string()
to_string(5)
這就是:值在“.”的左邊作為第一個參數命名的函數而已,沒有別的區別。
7、 派遣函數(Dispatch Functions)
ChaiScript允許函數重載,使用派遣函數可以自動的使用相應的函數已達到相應的功能。比如說,你想從一堆數中打印出正確的復數,可以這樣寫代碼:
def print_num(x) : x == 0 || x > 1
{
print(x.to_string() + " units")
}
def print_num(x) : x == 1
{
print(x.to_string() + " unit")
}
print_num(2)
print_num(1)
print_num(0)
在VC工程中使用ChaiScript
1、一個chaiscript的測試程序
在我們下載回來的源代碼中有一個TestExample工程的例子,我不知道它是在VS的多少版本下創建的,改了一下它的工程文件,在2005下編譯過了,但是它目錄設置的很雜,所以,我們在這里自己新建一個控制臺工程,把它的源代碼copy過來,我們研究下,源代碼如下:
// TestExample.cpp : 定義控制臺應用程序的入口點。
//
#include "stdafx.h"
#include <iostream>
#include <chaiscript/chaiscript.hpp>
#include <chaiscript/dispatchkit/function_call.hpp>
#include <boost/function.hpp>
#include <boost/date_time/posix_time/posix_time.hpp>
#include <boost/regex.hpp>
void log(const std::string &msg)
{
std::cout << "[" << boost::posix_time::microsec_clock::local_time() << "] " << msg << std::endl;
}
void log(const std::string &module, const std::string &msg)
{
std::cout << "[" << boost::posix_time::microsec_clock::local_time() << "] <" << module << "> " << msg << std::endl;
}
struct System
{
std::map<std::string, boost::function<std::string (const std::string &) > > m_callbacks;
void add_callback(const std::string &t_name,
const chaiscript::Proxy_Function &t_func)
{
m_callbacks[t_name] = chaiscript::functor<std::string (const std::string &)>(t_func);
}
void do_callbacks(const std::string &inp)
{
log("Running Callbacks: " + inp);
for (std::map<std::string, boost::function<std::string (const std::string &)> >::iterator itr = m_callbacks.begin();
itr != m_callbacks.end();
++itr)
{
log("Callback: " + itr->first, itr->second(inp));
}
}
};
int _tmain(int argc, _TCHAR* argv[])
{
using namespace chaiscript;
ChaiScript chai;
//創建一個新的system 對象
System system;
//把它添加到chaiscript引擎中
chai.add(var(&system), "system");
//注冊System結構體的兩個方法.
chai.add(fun(&System::add_callback), "add_callback");
chai.add(fun(&System::do_callbacks), "do_callbacks");
// 讓我們用chaiscript給我們的system結構添加一個新的回調函數。
// 在Chaiscript中創建函數"{ 'Callback1' + x }" 并通過我們C++程序System結構中的add_callback函數
// 將這個chaiscript腳本函數轉換到boost::function,
// so it can be handled and called easily and type-safely
chai.eval("system.add_callback(\"#1\", fun(x) { \"Callback1 \" + x });");
// 由于我們在chaiscript引擎中共享了“system”對象
// 所以我們可以同時在C++代碼中和Chaiscript腳本中使用這個對像
system.do_callbacks("TestString");
chai.eval("system.do_callbacks(\"TestString\");");
// 日志函數被(log)重載過了, 因此我們必須得同時C++編譯器,我們要注冊那個版本的日志函數。
// 這樣,唯一的一個方法就是用typedef創建一個函數指針,然后注冊這個函數指針就可以了
typedef void (*PlainLog)(const std::string &);
typedef void (*ModuleLog)(const std::string &, const std::string &);
chai.add(fun(PlainLog(&log)), "log");
chai.add(fun(ModuleLog(&log)), "log");
chai.eval("log(\"Test Message\")");
// 由于eval函數重載了操作符(),因此我們可以直接使用chai關鍵字而省去eval方法。
chai("log(\"Test Module\", \"Test Message\");");
//最后, 我們可以注冊任何一個boost::function 作為sys對象的函數, 按照這樣來說,
//我們可以給system對象添加一個受限的成員函數,例如:
chai.add(fun(boost::function<void ()>(boost::bind(&System::do_callbacks, boost::ref(system), "Bound Test"))), "do_callbacks");
//調用限制版本的do_callbacks函數
chai("do_callbacks()");
boost::function<void ()> caller = chai.functor<void ()>("fun() { system.do_callbacks(\"From Functor\"); }");
caller();
//如果我們想從所有的調用中得到一個類型安全的返回值,那我們可以使用eval的模板,如下:
int i = chai.eval<int>("5+5");
std::cout << "5+5: " << i << std::endl;
//添加一個新的變量
chai("var scripti = 15");
//我們甚至可以操作system的變量
int &scripti = chai.eval<int &>("scripti");
std::cout << "scripti: " << scripti << std::endl;
scripti *= 2;
std::cout << "scripti (updated): " << scripti << std::endl;
chai("print(\"Scripti from chai: \" + to_string(scripti))");
//要做到: 在需要時添加一個直接處理Boxed_Values 的實例。
//在堆棧上創建和使用函數
int x = chai.functor<int (int, int)>("fun (x, y) { return x + y; }")(5, 6);
log("Functor test output", boost::lexical_cast<std::string>(x));
//在需要的時候,可以創建自己的容器. 目前可以支持大多數的std::vector 和std::map
chai.add(bootstrap::vector_type<std::vector<int> >("IntVector"));
return 0;
}
我這破英文底子,哎~~我硬著頭皮大概翻譯了一下,方便比我還差的朋友閱讀,翻譯的肯定有不對的,大家可以參考源程序的英文注釋,這里還望大家多多指正。
根據這些注釋,我想看懂這個程序應該不難的。這樣,我們也就知道ChaiScript的基礎用法了。
下面我將更詳細的講述著程序中的知識點。
2、將ChaiScript添加到現有的VC工程中。
在ChaiScript文件夾的Readme.txt文件告訴我們:
² 把ChaiScript的include目錄添加到工程的包含目錄中。
² 在我們的工程原文件中包含 "#include <chaiscript/chaiscript.hpp> 。
² 在我們的工程中創建ChaiScript引擎的實例.
例如, 創建一個新的名為“chai”的引擎可以這樣編寫代碼:
using namespace chaiscript;
ChaiScript chai;
或者寫成:
chaiscript::ChaiScript chai;
3、ChaiScript腳本與C++相互調用
1) 在C++中調用/執行ChaiScript代碼
現在,我們有兩種方法來調用/執行ChaiScript腳本代碼:
² 第一種方法:直接在C++代碼中編寫并執行ChaiScript代碼,例如:
//添加一個新的變量
chai("var scripti = 15");
甚至我們都可以直接獲取腳本的表達式的值,例如:
int i = chai.eval<int>("5+5");
² 第二種方式是直接調用ChaiScript腳本文件來執行。例如:
我們可以編寫腳本如下:
// HelloWorld.chai
print("hello chaiscript world...")
編寫控制臺程序如下:
#include <iostream>
#include <chaiscript/chaiscript.hpp>
#include <chaiscript/dispatchkit/function_call.hpp>
#include <boost/function.hpp>
#include <boost/date_time/posix_time/posix_time.hpp>
#include <boost/regex.hpp>
int _tmain(int argc, _TCHAR* argv[])
{
using namespace chaiscript;
ChaiScript chai;
chai.eval_file(".\\HelloWorld.chai\0"); // 調用我們剛寫的腳本
return 0;
}
程序執行結果如下:

2) 在C++中使用腳本的變量(對象)
//添加一個新的變量
chai("var scripti = 15");
//我們甚至可以操作system的變量
int &scripti = chai.eval<int &>("scripti");
std::cout << "scripti: " << scripti << std::endl;
scripti *= 2;
std::cout << "scripti (updated): " << scripti << std::endl;
chai("print(\"Scripti from chai: \" + to_string(scripti))");
上面這段代碼,相信大家應該都有印象吧,這段代碼很簡明的描述了如何在C++中操作ChaiScript中的變量的方法:使用引用。
3) 在C++中調用ChaiScript中定義的函數。
總是感覺ChaiScript::functor這個模板的功能很神奇哈,在我們一開始的測試程序中,看到了關于它的很多神奇的用法,由于我的個人能力有限,值說明一下它的基本用法,至于其它的,大家可以自己去摸索。
先看下functor的聲明吧:
template<typename FunctionType>
boost::function<FunctionType> functor(const std::string &script)
{
return chaiscript::functor<FunctionType>(eval(script));
}
很明白了吧,我們這個字符串就相當于直接在ChaiScript寫腳本了,沒有什么別的估計的,直接調用我們編寫的函數就好,OK,不多廢話,在腳本中創建函數如下:
// TestFor.chai
def TestFor()
{
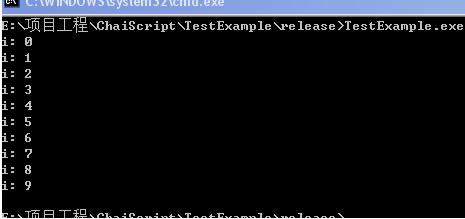
for (var i = 0; i < 10; ++i)
{
print("i: " + i.to_string())
}
}
編寫我們的C程序如下:
#include <iostream>
#include <chaiscript/chaiscript.hpp>
#include <chaiscript/dispatchkit/function_call.hpp>
#include <boost/function.hpp>
#include <boost/date_time/posix_time/posix_time.hpp>
#include <boost/regex.hpp>
int _tmain(int argc, _TCHAR* argv[])
{
using namespace chaiscript;
ChaiScript chai;
chai.eval_file(".\\TestFor.chai\0");
boost::function<void ()> TestFor = chai.functor<void ()>("TestFor"); // 關聯我們的腳本函數
TestFor(); // 調用腳本函數
return 0;
}
程序執行結果如下:
4) 在腳本中調用C++函數/ 對象
到現在,我們應該對ChaiScript有一定得了解了,應該知道,如果要在腳本中使用C++對象或者使用C++的函數應該先把函數注冊到ChaiScript引擎中。
在ChaiScript1.1中注冊函數或者對象的方法已經與1.0版本發生的一點變化,1.1版本注冊函數/對象的語法格式如下:
注冊對象的語法格式:
/創建一個新的system 對象
System system;
//把它添加到chaiscript引擎中
chai.add(var(&system), "system");
注冊函數的語法格式:
chai.add(fun(&MyClass::function), "method");
上述格式注冊的是我們的類成員函數,如果要注冊一個獨立的函數,那可以先聲明一個這個函數的指針然后在注冊,如下例子:
我們可以編寫腳本如下:
// HelloWorld.chai
log("hello chaiscript world...")
編寫控制臺程序如下:
#include <iostream>
#include <chaiscript/chaiscript.hpp>
#include <chaiscript/dispatchkit/function_call.hpp>
#include <boost/function.hpp>
#include <boost/date_time/posix_time/posix_time.hpp>
#include <boost/regex.hpp>
void log(const std::string &msg)
{
std::cout << "[" << boost::posix_time::microsec_clock::local_time() << "] " << msg << std::endl;
}
int _tmain(int argc, _TCHAR* argv[])
{
using namespace chaiscript;
typedef void (*PlainLog)(const std::string &);
ChaiScript chai;
chai.add(fun(PlainLog(&log)), "log"); // 注冊C++函數,以便在腳本中調用它
chai.eval_file(".\\HelloWorld.chai\0"); // 調用我們剛寫的腳本
return 0;
}
程序執行結果如下:

好,到這里,在VC中使用ChaiScript腳本的內容就講完了,其實重點就是幾個ChaiScript中的幾個API的使用,如:ChaiScript::add、ChaiScript::eval、ChaiScript::eval_file、 ChaiScript::functor等等。
這些ChaiScript API更多更詳細的介紹,請大家關注:http://www.chaiscript.com/node/28