新建網頁 1
17.3使用頂點著色器的步驟
下面的列表概括了創建和使用頂點著色器的必須步驟:
1. 編寫并編譯頂點著色器
2. 創建一個IDirect3DVertexShader9接口以引用已編譯的著色器代碼上的頂點著色器。
3. 用IDirect3DDevice9:: SetVertexShader方法使用這個頂點著色器。
當然,在我們做完這些之后,我們還得銷毀這個頂點著色器。
17.3.1 編寫并編譯頂點著色器
首先,我們必須編寫一個頂點著色器程序。一旦著色器代碼寫好之后,我們就使用D3DXCompileShaderFromFile函數編譯這個著色器。回憶一下,這個函數返回一個ID3DXBuffer指針,它包含已編譯的著色器代碼。
17.3.2 創建頂點著色器
一旦我們擁有了編譯好的著色器代碼,我們就能夠獲得一個IDirect3DVertexShader9接口的指針,它代表一個頂點著色器——通過使用下面的方法:
|
HRESULT IDirect3DDevice9::CreateVertexShader(
const DWORD *pFunction,
IDirect3DVertexShader9** ppShader
);
|
pFunction——已編譯著色器代碼的指針
ppShader——返回一個IDirect3DVertexShader9接口的指針
例如,假設變量shader是一個包含已編譯的,著色器代碼的ID3DXBuffer指針。然后要獲得一個IDirect3DVertexShader9接口,我們可以寫:
|
IDirect3DVertexShader9* ToonShader = 0;
hr = Device->CreateVertexShader(
(DWORD*)shader->GetBufferPointer(),
&ToonShader);
|
注意:重申一遍,D3DXCompileShaderFromFile是一個函數,它將返回已編譯著色器的代碼(shader)。
17.3.3 建立頂點著色器
在我們獲得了一個代表我們的頂點著色器的IDirect3DVertexShader9接口的指針之后,我們就能夠使用下面的方法使用它:
|
HRESULT IDirect3DDevice9::SetVertexShader(
IDirect3DVertexShader9* pShader
);
|
這個方法僅接受一個參數,我們在其中傳遞一個想要使用的頂點著色器的指針。要使用這個著色器,我們可以寫:Device->SetVertexShader(ToonShader);
17.3.4 銷毀頂點著色器
和所有的Direc3D接口一樣,要清除他們,我們就必須在用完它們之后調用其的Release方法。
17.4應用程序:散射光照
作為創建并使用頂點著色器的熱身,我們寫一個頂點著色器,它用一個方向(平行)光對每個頂點進行標準的散射光照。簡而言之,散射光照根據頂點法線和光線向量(它朝向光源方向)的角度計算頂點接收到的光線的數量。角度越小,則頂點接收到的光線就越多;而角度越大,則頂點接收到的光線就越少。如果角度大于等于90度,頂點就接收不到光線了。
我們以檢閱著色器代碼作為開始:
/**********************************************************************************
Vertex shader that does diffuse lighting.
**********************************************************************************/
matrix g_view_matrix;
matrix g_view_proj_matrix;
vector g_ambient_material;
vector g_diffuse_material;
vector g_dir_to_light; // the direction to the light source
// Global variables used to hold the ambient light intensity (ambient light the light
// source emits) and the diffuse light intensity (diffuse light the light source emits).
// These variables are initialized here in the shader.
const vector DIFFUSE_LIGHT_INTENSITY = {0.5f, 0.5f, 0.5f, 1.0f};
const vector AMBIENT_LIGHT_INTENSITY = {2.0f, 2.0f, 1.0f, 1.0f};
struct sVertexInput
{
vector position : POSITION;
vector normal : NORMAL;
};
struct sVertexOutput
{
vector position : POSITION;
vector diffuse : COLOR;
};
///////////////////////////////////////////////////////////////////////////////////////////////
sVertexOutput main(sVertexInput vertex_input)
{
sVertexOutput vertex_output = (sVertexOutput) 0;
// transform position to homogeneous clip space
vertex_output.position = mul(vertex_input.position, g_view_proj_matrix);
// Transform lights and normals to view space.
// Set w components to zero since we're transforming vectors here and not points.
g_dir_to_light.w = 0.0f;
vertex_input.normal.w = 0.0f;
g_dir_to_light = mul(g_dir_to_light, g_view_matrix);
vertex_input.normal = mul(vertex_input.normal, g_view_matrix);
// compute cosine of the angle between light and normal
float scalar = dot(g_dir_to_light, vertex_input.normal);
// Recall that if the angle between the surface and light is greater than 90 degrees
// the surface recieves no light. Thus, if the angle is greater than 90 degrees we set
// scalar to zero so that the surface will not be lit.
if(scalar < 0.0f)
scalar = 0.0f;
// Ambient light reflected is computed by performing a component wise multiplication with
// the ambient material vector and the ambient light intensity vector.
//
// Diffuse light reflected is computed by performing a component wise multiplication with
// the diffuse material vector and the diffuse light intensity vector.
// Further we scale each component by the shading scalar s, which shades the color based on
// how much light the vertex received from the light source.
//
// The sum of both the ambient and diffuse components gives us our final vertex color.
vertex_output.diffuse = (g_ambient_material * AMBIENT_LIGHT_INTENSITY) +
(scalar * (g_diffuse_material * DIFFUSE_LIGHT_INTENSITY));
return vertex_output;
}
執行程序:
/**************************************************************************************************
Demonstrates diffuse lighting using a vertex shader. You will have to switch to
the REF device to run this sample if your hardware does not support shaders.
Or you can use software vertex processing: D3DCREATE_SOFTWARE_VERTEXPROCESSING.
**************************************************************************************************/
#include "d3dUtility.h"
#pragma warning(disable : 4100)
const int WIDTH = 640;
const int HEIGHT = 480;
IDirect3DDevice9* g_device;
ID3DXMesh* g_teapot_mesh;
IDirect3DVertexShader9* g_vertex_shader;
ID3DXConstantTable* g_constant_table;
D3DXHANDLE g_view_matrix_handle;
D3DXHANDLE g_view_proj_matrix_handle;
D3DXHANDLE g_ambient_material_handle;
D3DXHANDLE g_diffuse_material_handle;
D3DXHANDLE g_dir_to_light_handle;
D3DXMATRIX g_proj_matrix;
////////////////////////////////////////////////////////////////////////////////////////////////////
bool setup()
{
D3DXCreateTeapot(g_device, &g_teapot_mesh, NULL);
// compile shader
ID3DXBuffer* shader_buffer;
ID3DXBuffer* error_buffer;
HRESULT hr = D3DXCompileShaderFromFile("DiffuseShader.cxx", NULL, NULL, "main", "vs_1_1",
D3DXSHADER_ENABLE_BACKWARDS_COMPATIBILITY,
&shader_buffer, &error_buffer, &g_constant_table);
// output any error messages
if(error_buffer)
{
MessageBox(NULL, (char*)error_buffer->GetBufferPointer(), "ERROR", MB_OK);
safe_release<ID3DXBuffer*>(error_buffer);
}
if(FAILED(hr))
{
MessageBox(NULL, "D3DXCreateEffectFromFile() - FAILED", "ERROR", MB_OK);
return false;
}
hr = g_device->CreateVertexShader((DWORD*) shader_buffer->GetBufferPointer(), &g_vertex_shader);
if(FAILED(hr))
{
MessageBox(NULL, "CreateVertexShader - FAILED", "ERROR", MB_OK);
return false;
}
safe_release<ID3DXBuffer*>(shader_buffer);
// get handles
g_view_matrix_handle = g_constant_table->GetConstantByName(NULL, "g_view_matrix");
g_view_proj_matrix_handle = g_constant_table->GetConstantByName(NULL, "g_view_proj_matrix");
g_ambient_material_handle = g_constant_table->GetConstantByName(NULL, "g_ambient_material");
g_diffuse_material_handle = g_constant_table->GetConstantByName(NULL, "g_diffuse_material");
g_dir_to_light_handle = g_constant_table->GetConstantByName(NULL, "g_light_direction");
//
// set shader constants
//
// light direction
D3DXVECTOR4 dir_to_light(-0.57f, 0.57f, -0.57f, 0.0f);
g_constant_table->SetVector(g_device, g_dir_to_light_handle, &dir_to_light);
// materials
D3DXVECTOR4 ambient_material(1.0f, 1.0f, 0.5f, 1.0f);
D3DXVECTOR4 diffuse_material(1.0f, 1.0f, 0.5f, 1.0f);
g_constant_table->SetVector(g_device, g_ambient_material_handle, &ambient_material);
g_constant_table->SetVector(g_device, g_diffuse_material_handle, &diffuse_material);
g_constant_table->SetDefaults(g_device);
// set the projection matrix
D3DXMatrixPerspectiveFovLH(&g_proj_matrix, D3DX_PI/4.0f, (float)WIDTH/HEIGHT, 1.0f, 1000.0f);
//g_device->SetRenderState(D3DRS_FILLMODE, D3DFILL_WIREFRAME);
return true;
}
///////////////////////////////////////////////////////////////////////////////////////////////////////
void cleanup()
{
safe_release<ID3DXMesh*>(g_teapot_mesh);
safe_release<IDirect3DVertexShader9*>(g_vertex_shader);
safe_release<ID3DXConstantTable*>(g_constant_table);
}
///////////////////////////////////////////////////////////////////////////////////////////////////////
bool display(float time_delta)
{
static float angle = (3.0f * D3DX_PI) / 2.0f;
static float height = 3.0f;
if(GetAsyncKeyState(VK_LEFT) & 0x8000f)
angle -= 0.5f * time_delta;
if(GetAsyncKeyState(VK_RIGHT) & 0x8000f)
angle += 0.5f * time_delta;
if(GetAsyncKeyState(VK_UP) & 0x8000f)
height += 5.0f * time_delta;
if(GetAsyncKeyState(VK_DOWN) & 0x8000f)
height -= 5.0f * time_delta;
D3DXVECTOR3 position(cosf(angle) * 7.0f, height, sinf(angle) * 7.0f);
D3DXVECTOR3 target(0.0f, 0.0f, 0.0f);
D3DXVECTOR3 up(0.0f, 1.0f, 0.0f);
D3DXMATRIX view_matrix;
D3DXMatrixLookAtLH(&view_matrix, &position, &target, &up);
D3DXMATRIX view_proj_matrix = view_matrix * g_proj_matrix;
g_constant_table->SetMatrix(g_device, g_view_proj_matrix_handle, &view_proj_matrix);
// render now
g_device->Clear(0, NULL, D3DCLEAR_TARGET | D3DCLEAR_ZBUFFER, 0x00000000, 1.0f, 0);
g_device->BeginScene();
g_device->SetVertexShader(g_vertex_shader);
g_teapot_mesh->DrawSubset(0);
g_device->EndScene();
g_device->Present(NULL, NULL, NULL, NULL);
return true;
}
///////////////////////////////////////////////////////////////////////////////////////////////////////
LRESULT CALLBACK wnd_proc(HWND hwnd, UINT msg, WPARAM word_param, LPARAM long_param)
{
switch(msg)
{
case WM_DESTROY:
PostQuitMessage(0);
break;
case WM_KEYDOWN:
if(word_param == VK_ESCAPE)
DestroyWindow(hwnd);
break;
}
return DefWindowProc(hwnd, msg, word_param, long_param);
}
///////////////////////////////////////////////////////////////////////////////////////////////////////
int WINAPI WinMain(HINSTANCE inst, HINSTANCE, PSTR cmd_line, int cmd_show)
{
if(! init_d3d(inst, WIDTH, HEIGHT, true, D3DDEVTYPE_HAL, &g_device))
{
MessageBox(NULL, "init_d3d() - failed.", 0, MB_OK);
return 0;
}
if(! setup())
{
MessageBox(NULL, "Steup() - failed.", 0, MB_OK);
return 0;
}
enter_msg_loop(display);
cleanup();
g_device->Release();
return 0;
}
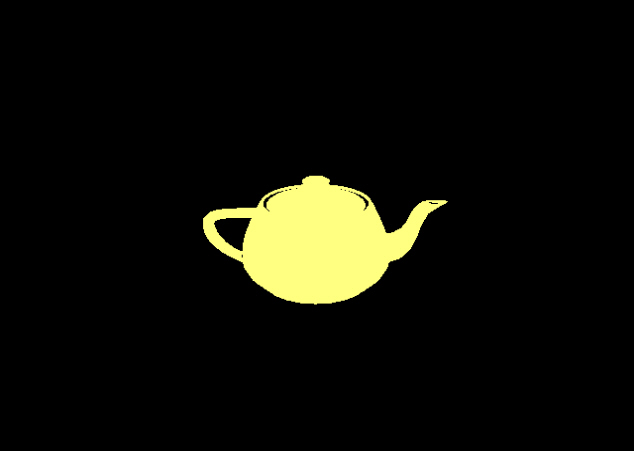
運行截圖:
setup函數執行下列任務:
創建茶壺網格
編譯頂點著色器
根據已編譯代碼創建頂點著色器
通過常量表獲取著色器程序中的幾個變量的句柄
通過常量表初始化著色器的這幾個變量
注意:對于本應用程序,我們的頂點結構不需要任何自由頂點格式沒有的額外的分量。
display函數非常簡單。它檢測用戶輸入(這里指的是用戶輸入的傳入著色器程序的變量),并相應的更新視圖矩陣。但是,因為我們在著色器中執行這個視圖矩陣變換,所以我們還必須更新著色器中的視圖矩陣變量。我們用常量表完成這件事情。
下載源程序