放一堆c++代碼
附件中的代碼是我從之前開發的蓋莫游戲引擎中扯出來,主要是為了提高代碼復用率
另外也希望附件代碼對他人有所幫助。
當然如果有什么好的建議也可以告訴我
當然如果有什么好的類似的代碼想合并到一起的話也可以找我
關于附件
包含內容有:
1.模板-2,3,4維向量
2.簡單的隨機數對象
3.日志對象
4.顏色
5.類似MFC-Object的對象一個
6.基于XML的對象序列化框架一個
7.簡單的文件系統一個
8.Ini解析對象一個
9.一個小型的信號插槽系統
10.編碼處理對象一個
可以自由使用(包含源碼)
ps:
a.如果有對代碼有好的意見可以提出來.
b.XXX
/Files/gaimor/gCore.zip
這是學習QT的第10篇文章
現在總算入門了
要想快速學習新的知識一個是要多看還有一個是要多練
本篇就是使用QT開發軟件的開始
不過只是開始,我并不打算弄一個完完整整的例子
而是通過迭代式的循序漸進的方式一步一步完善軟件
所以現在做出來的只是一個毛胚而已
首先上代碼:
#include <QtGui/QMainWindow>
QT_BEGIN_NAMESPACE
class QAction;
class QToolBar;
class QMenu;
class QWidget;
QT_END_NAMESPACE
class MainWindow : public QMainWindow
{
Q_OBJECT
public:
MainWindow(QWidget *parent = 0);
~MainWindow();
public:
void CreateAction();
void CreateMenu();
void CreateToolBar();
private slots:
void home();
void about();
void setting();
void running();
private:
QMenu* setting_;
QMenu* home_;
QMenu* running_;
QMenu* about_;
QToolBar* settingbar;
QToolBar* homebar;
QToolBar* runningbar;
QToolBar* aboutbar;
QAction* settingaction;
QAction* homeaction;
QAction* runningaction;
QAction* aboutaction;
};
.cpp
本文沒有多少新的內容
需要說的2點:
1.qrc文件
這是QT的資源文件
我們可以把圖標通過資源文件的方式包含進程序里面
本文的qrc內容如下:
<!DOCTYPE RCC><RCC version="1.0">
<qresource>
<file>images/home.png</file>
<file>images/running.png</file>
<file>images/about.png</file>
<file>images/setting.png</file>
<file>images/logo.png</file>
</qresource>
</RCC>
那么使用的時候就可以這樣調用了:
QIcon(":/images/home.png")
注意字符串最前面是一個冒號!
2.menuBar()和addToolBar的問題
menuBar()是QWidget中用于獲取控件菜單欄的函數
addToolBar是增加工具條到控件的函數如果沒有調用menuBar也沒有調用addToolBar那可以認為控件是又沒菜單項和工具條的
在這里我的感覺是既然menuBar是獲取控件菜單項的函數,那為什么沒有對應的toolBar?或者有addToolBar而無對于德addMenu?
從命名風格上上看我們還是希望程序命名盡可能一致的,這樣可以減少使用者的記憶量。
--------當然這也行有這樣寫的理由
3.QT中打開給定網頁鏈接的方法:
const QUrl url("http://www.shnenglu.com/gaimor/");
QDesktopServices::openUrl(url);
3.至于本程序文最終界面如下:
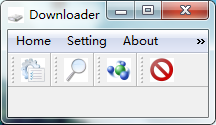
可以看出由于沒有設置其他控件 導致程序界面沒有被展開
這是第9篇學習QT的例子
本文主要學習自帶的Dock Widget例子
這個例子主要包含以下QT控件
1.Dock
2.Menu
3.ToolBar
1.看看例子還是說
QMainWindow吧
什么是QMainWindow?
A main window provides a framework for building an application's user interface. Qt has QMainWindow and its related classes for main window management. QMainWindow has its own layout to which you can add QToolBars, QDockWidgets, QDockBars,QDockWidgets, a QStatusBar. 總而言之:QMainWindow提供構建應用程序接口的框架。QMainWindow提供獨有的布局結構以便于用戶加入QToolBar,QDockWidgets,QDockBars和QStatusBar.
2.使用自定義對象從QT對象繼承的方法
除了必要的 :public QTObject
還要加入宏Q_OBJECT
如果必要加入槽,信號函數
一個例子是:
class MainWindow : public QMainWindow
{
Q_OBJECT
public:
MainWindow();
private slots:
void newLetter();
void save();
void print();
void undo();
void about();
void insertCustomer(const QString &customer);
void addParagraph(const QString ¶graph);
3.狀態欄
設置狀態欄信息的函數
例子:
statusBar()->showMessage(tr("Ready"));
4.文件打開和保存對話框
QString fileName = QFileDialog::getSaveFileName(this,
tr("Choose a file name"), ".",
tr("HTML (*.html *.htm)"));
5.再說下QAction
newLetterAct = new QAction(QIcon(":/images/new.png"), tr("&New Letter"),
this);
newLetterAct->setShortcuts(QKeySequence::New);
newLetterAct->setStatusTip(tr("Create a new form letter"));
connect(newLetterAct, SIGNAL(triggered()), this, SLOT(newLetter()));
通過調用setStatusTip可以設置action提示信息
6.
QTextDocument對象
原文解釋:
The QTextDocument class holds formatted text that can be viewed and edited using a QTextEdit.
通過QTextEdit的document可以獲取QTextDocument對象
假定需要響應文檔撤銷事件
一個可能的例子就是:
void MainWindow::undo()
{
QTextDocument *document = textEdit->document();
document->undo();
}
7.QTextCursor
The QTextCursor class offers an API to accDuess and modify QTextDocuments.
我們就可以得出QTextCursor訪問和修改QTextDocument,QTextDocumnt顯示QTextEdit內容文本。
8.QDockWidget
The QDockWidget class provides a widget that can be docked inside a QMainWindow floated as a top-level window on the desktop.關于Dock的用法如下:
設置Dock為左右結構
dock->setAllowedAreas(Qt::LeftDockWidgetArea | Qt::RightDockWidgetArea);
設置Dock內容控件
dock
->setWidget
(customerList
);
把這個dock放在窗體右邊
addDockWidget
(Qt::RightDockWidgetArea
, dock
);
9.這個例子還有其他的對象比如QListWidget以后再看吧
不過這一篇感覺有幾個疑惑的地方
比如:
QDockWidget *dock = new QDockWidget(tr("Customers"), this);
dock->setAllowedAreas(Qt::LeftDockWidgetArea | Qt::RightDockWidgetArea);
customerList = new QListWidget(dock);
customerList->addItems(QStringList()
<< "John Doe, Harmony Enterprises, 12 Lakeside, Ambleton"
<< "Jane Doe, Memorabilia, 23 Watersedge, Beaton"
<< "Tammy Shea, Tiblanka, 38 Sea Views, Carlton"
<< "Tim Sheen, Caraba Gifts, 48 Ocean Way, Deal"
<< "Sol Harvey, Chicos Coffee, 53 New Springs, Eccleston"
<< "Sally Hobart, Tiroli Tea, 67 Long River, Fedula");
dock->setWidget(customerList);
addDockWidget(Qt::RightDockWidgetArea, dock);
viewMenu->addAction(dock->toggleViewAction());
dock = new QDockWidget(tr("Paragraphs"), this);
其中的dock new了2次并沒有調用相應的delete.
不知道QT具體是如何實現的
另外在QT的例子中在程序結束的時候并沒有銷毀new出來的指針
不知道QT有內在機制保證內存不會泄露還是?
QT學習筆記-8.查找文件對話框
只所以選擇這個QT自帶的例子有2個原因
1是界面簡單容易理解
2是當點擊more按鍵會動態改變窗體出現高級選項(我想知道這個是如何做到的)
基本代碼如下:
#ifndef FINDDIALOG_H
#define FINDDIALOG_H
#include <QDialog>
QT_BEGIN_NAMESPACE
class QCheckBox;
class QDialogButtonBox;
class QGroupBox;
class QLabel;
class QLineEdit;
class QPushButton;
QT_END_NAMESPACE
class FindDialog : public QDialog
{
Q_OBJECT
public:
FindDialog(QWidget *parent = 0);
private:
QLabel *label;
QLineEdit *lineEdit;
QCheckBox *caseCheckBox;
QCheckBox *fromStartCheckBox;
QCheckBox *wholeWordsCheckBox;
QCheckBox *searchSelectionCheckBox;
QCheckBox *backwardCheckBox;
QDialogButtonBox *buttonBox;
QPushButton *findButton;
QPushButton *moreButton;
QWidget *extension;
};
#endif
.cpp
#include <QtGui>
#include "finddialog.h"
FindDialog::FindDialog(QWidget *parent)
: QDialog(parent)
{
label = new QLabel(tr("Find &what:"));
lineEdit = new QLineEdit;
//! 這個成員函數的作用是當點擊控件快捷鍵則把響應發送到Buddy控件
label->setBuddy(lineEdit);
caseCheckBox = new QCheckBox(tr("Match &case"));
fromStartCheckBox = new QCheckBox(tr("Search from &start"));
fromStartCheckBox->setChecked(true);
findButton = new QPushButton(tr("&Find"));
findButton->setDefault(true);
moreButton = new QPushButton(tr("&More"));
moreButton->setCheckable(true);
//moreButton->setAutoDefault(false);
//! 又是對話框按鈕盒,不過這次使用和上次有點區別 其子按鈕是加上去的
buttonBox = new QDialogButtonBox(Qt::Vertical);
buttonBox->addButton(findButton, QDialogButtonBox::ActionRole);
buttonBox->addButton(moreButton, QDialogButtonBox::ActionRole);
extension = new QWidget;
wholeWordsCheckBox = new QCheckBox(tr("&Whole words"));
backwardCheckBox = new QCheckBox(tr("Search &backward"));
searchSelectionCheckBox = new QCheckBox(tr("Search se&lection"));
//! 綁定時間(需要注意的是SINGLA,SLOT中的函數必須是形式完備的)
connect(moreButton, SIGNAL(toggled(bool)), extension, SLOT(setVisible(bool)));
//! 擴展控件部分(使用QVBox布局)
QVBoxLayout *extensionLayout = new QVBoxLayout;
extensionLayout->setMargin(0);
extensionLayout->addWidget(wholeWordsCheckBox);
extensionLayout->addWidget(backwardCheckBox);
extensionLayout->addWidget(searchSelectionCheckBox);
extension->setLayout(extensionLayout);
//! 文本框和搜索鍵
QHBoxLayout *topLeftLayout = new QHBoxLayout;
topLeftLayout->addWidget(label);
topLeftLayout->addWidget(lineEdit);
//! 輔助控件組
QVBoxLayout *leftLayout = new QVBoxLayout;
leftLayout->addLayout(topLeftLayout);
leftLayout->addWidget(caseCheckBox);
leftLayout->addWidget(fromStartCheckBox);
leftLayout->addStretch(1);
//! 主布局使用格子管理器
QGridLayout *mainLayout = new QGridLayout;
//! 設置大小不能更改
mainLayout->setSizeConstraint(QLayout::SetFixedSize);
//! 把LeftLayout管理器放在左上角即0,0位置處
mainLayout->addLayout(leftLayout, 0, 0);
mainLayout->addWidget(buttonBox, 0, 1);
mainLayout->addWidget(extension, 1, 0);
setLayout(mainLayout);
setWindowTitle(tr("Extension"));
extension->setVisible(false);
}
需要說明的是
#include <QtGui>是包含所有的GUI控件頭文件
我們不再需要
#include <QLabel>
#include <QEdit>
不過看看代碼還真應了那句話復雜界面都是布局管理器堆積出來的
另外注意這句話
mainLayout->addWidget(extension, 1, 0);
把extension放在格子管理器的1,0位置
如果注銷掉這句話可以看看出來的界面是什么樣子的
最后要說的就是extension->setVisible(false);
在開始我們把exntension控件設置為隱藏狀態
當然也可以使用函數hide().
由于之前綁定了more按鍵和extension,
我們就可以通過點擊more按鍵來顯示和隱藏extension控件了
摘要:
閱讀全文
1.QString
在c++標準庫中有2種類型的字符串char*和std::string
QT則提供了對象QString
QString除了具備字符串對象一般功能函數之外還提供了自己特有的功能比如:
str.sprintf("%s %.1f%%", "perfect competition", 100.0); ---格式化輸出
當然也可以使用匿名形式
str = QString("%1 %2 (%3s-%4s)").arg("permissive").arg("society").arg(1950).arg(1970);
%1,%2,%3是占位符
另外QString還提供了一系列類型類型裝換函數比如:
str = QString::number(59.6);
str.setNum(59.6);
當然還有其他功能
下面是具體的測試例子:
#include <QtCore/QCoreApplication>
#include <QString>
#include <QtDebug>
int main(int argc, char *argv[])
{
QCoreApplication a(argc, argv);
QString str;
str.append("Hello QT");
qDebug()<<str.left(3);
qDebug()<<str.right(3);
qDebug()<<str.mid(2,2);
qDebug()<<str.mid(2);
qDebug()<<str.indexOf("QT");
qDebug()<<str.startsWith("Hello");
qDebug()<<str.toLower();
str.replace(" ","O(∩_∩)O~");
qDebug()<<str;
str.insert(0,"....");
qDebug()<<str;
str.remove(0,3);
qDebug()<<str;
str = QString("%1%2%3").arg("1").arg(2).arg("3");
qDebug()<<str;
return a.exec();
}
當然還有其他它功能
2.QByteArray
QByteArray是比特數組
為了掌握它的基本功能還是測試下功能大致就知道了
#include <QtCore/QCoreApplication>
#include <QByteArray>
#include <QtDebug>
int main(int argc, char *argv[])
{
QCoreApplication a(argc, argv);
QByteArray arr;
arr.append("123");
qDebug()<<arr.at(2);
arr = "lots\t of\nwhitespace\r\n ";
qDebug()<<arr;
qDebug()<<arr.simplified();
qDebug()<<arr;
arr.chop(3);
qDebug()<<arr;
qDebug()<<arr.count();
qDebug()<<arr.isEmpty();
qDebug()<<arr.isNull();
arr.fill(244,10);
qDebug()<<arr;
return a.exec();
}
接上文,這篇學學QT中基本控件的使用和QApplication對象
1.什么是QApplication?
文檔說明:
The QApplication class manages the GUI application's control flow and main settings.
Application類管理GUI程序控制流和主要參數設置
QApplication繼承于QCoreApplication。后者提供了控制臺程序的事件流
2.基本控件的使用例子:
#include <QApplication>
#include <QLabel>
#include <QPalette>
#define QT_HTML
QLabel* label = NULL;
void initlabel()
{
#ifndef QT_HTML
label = new QLabel("Hello Qt!");
#else
label = new QLabel("<h2><i>Hello</i><font color=red>Qt!</font></h2>");
#endif
//! set size
label->setBaseSize(64,48);
//! set alignment
label->setAlignment(Qt::AlignHCenter);
//! sht background color
QColor bk(100,100,125);
QPalette palette(bk);
label->setPalette(palette);
}
int main(int argc, char *argv[])
{
QApplication app(argc, argv);
app.setApplicationName("QT Test");
initlabel();
label->show();
return app.exec();
}
QLabel是QT中的標簽控件它具有控件的一般屬性比如設置大小setBaseSite,設置對齊格式,當然也可以設置背景色或者圖片-這都是通過QPalette調色板來實現的
需要說明的是QT中的控件文本可以使用Html語法的文本來操作具體如上。
那覺這個功能比較給力!
3.那么什么是QPalette?
QPalette負責控制控件狀態的顏色組-注意是控件狀態。
那么對一個控件每個狀態的顏色都可以是不一樣的咯
至于QPalette的詳細功能和使用方法以后需要的時候再看吧
4.基本的信號鏈接使用例子
#include <QApplication>
#include <QPushButton>
int main(int argc, char *argv[])
{
QApplication app(argc, argv);
QPushButton *button = new QPushButton("Quit");
//! when click button, app exit.
QObject::connect(button, SIGNAL(clicked()),&app, SLOT(quit()));
button->show();
return app.exec();
}
5.一個復雜點的例子
#include <QApplication>
#include <QHBoxLayout>
#include <QSlider>
#include <QSpinBox>
#include <QIcon>
int main(int argc, char *argv[])
{
QApplication app(argc, argv);
QWidget* widget = new QWidget;
QIcon icon("config.png");
widget->setWindowIcon(icon);
widget->setWindowTitle("Using QT");
QSlider* slider = new QSlider(widget);
slider->setRange(0,99);
QSpinBox* spinbox = new QSpinBox(widget);
spinbox->setRange(0,99);
widget->show();
return app.exec();
}
編譯運行可以看出QWidget中默認的布局管理器是豎直向下排列的
在QT中可以通過setWindowIcon來設置窗體圖標
通過setWindowTitle設置窗體標題
6.加上布局管理器和信號連接的話代碼大致應該是這個樣子
#include <QApplication>
#include <QHBoxLayout>
#include <QSlider>
#include <QSpinBox>
#include <QIcon>
int main(int argc, char *argv[])
{
QApplication app(argc, argv);
QWidget* widget = new QWidget;
QIcon icon("config.png");
widget->setWindowIcon(icon);
widget->setWindowTitle("Using QT");
QSlider* slider = new QSlider(widget);
slider->setRange(0,99);
QSpinBox* spinbox = new QSpinBox(widget);
spinbox->setRange(0,99);
QHBoxLayout* layout = new QHBoxLayout;
layout->addWidget(spinbox);
//! adjust slider's direction
slider->setOrientation(Qt::Horizontal);
layout->addWidget(slider);
spinbox->setValue(28);
//! connect signals and slots
QObject::connect(spinbox, SIGNAL(valueChanged(int)),slider,SLOT(setValue(int)));
QObject::connect(slider,SIGNAL(valueChanged(int)),spinbox,SLOT(setValue(int)));
widget->setLayout(layout);
widget->show();
return app.exec();
}
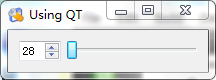
需要說明的是在這里QSlider,QPinBox控件是互動
編譯程序并運行界面如下:
這是關于QT的第六篇筆記
總結下吧
QT功能還是很強大貼心的
比較容易上手
不過有2點我感覺不大舒服的地方是對這個變量命名格式有點不大喜歡
比如setValue我喜歡寫成SetValue.
僅此而已
本文涉及QT中的容器對象系列
一容器
QVector類似stl中的vector插入尾部數據速度很快
基本例子如下:
QVector<double> vect(3);
vect[0] = 1.0;
vect[1] = 0.540302;
vect[2] = -0.416147;
這樣也可以
QVector<double> vect;
vect.append(1.0);
vect.append(0.540302);
vect.append(-0.416147);
另外也可以通過流
vect << 1.0 << 0.540302 << -0.416147;
2.QLinkedList沒有提供[]操縱
隨機訪問速度很慢
3.QList<T>序列容器是一種數組鏈表它具有前2者的大部分操作支持隨機訪問
在容器頭部尾部插入數據很迅速
4.QStringList是QList<QString>的子類提供以下操作
排序,過濾,正則表達式處理等
5.QStack<T> 提供push,pop,top等操作
6.Queue<T> QT的隊列模板
7.QMap<T,V>
基本操作如下:
QMap<QString, int> map;
map.insert("eins", 1);
map.insert("sieben", 7);
map.insert("dreiundzwanzig", 23);
當然也可以這樣插入數據
map["eins"] = 1;
map["sieben"] = 7;
map["dreiundzwanzig"] = 23;
但是這樣做有一個問題那就是會生成空值
為了不出現這樣的結果可以使用成員函數value()來代替[]來獲取數據,如果對于鍵不存在則返回默認的對象值
8.QHash<T,V> 使用散列存儲鍵值對
二通用算法
需要說明的是QT中的容器是stl風格的,這意味著可以使用Stl中的算法。
當然在QT庫中QtAlgorithm文件包含了基本的算法模板
主要的函數有
qFind-查找給定元素在容器中的位置類似std::find
qBinaryFind - 類似qFind 需要查找元素有序排列
qFill-類似std::fill 使用給定元素填充容器
qCopy,qSort..
qDeleteAll-函數對容器中的每個元素做刪除處理
基本的容器和算法就這么多了
其實熟悉stl的話學習這個上手很快的
本文主要是對C++ GUI Programming with Qt4一書 Signals and Slots in Depth 部分的翻譯
信號與插槽機制是Qt編程的基礎.它可以綁定對象而不需要對象之間彼此了解。
槽類似于c++中的成員函數他可以是虛擬的,可重載的,私有的,公開的,受保護的。
不同點式槽可以鏈接到信號。通過這種方式可以在每次信號發射的的時候做到調用槽函數
connect()語句是這樣的
connect(sender, SIGNAL(signal), receiver, SLOT(slot));
在這里sender和receiver是指向信號對象和槽對象的指針。宏SIGNAL()和SLOTS()負責轉換他們的參數到字符串。
當然一個信號可以連接到多個槽(似乎都是這樣的)
connect(slider, SIGNAL(valueChanged(int)),
spinBox, SLOT(setValue(int)));
connect(slider, SIGNAL(valueChanged(int)),
this, SLOT(updateStatusBarIndicator(int)));
同樣多個信號可以連接到單個槽
例如:
connect(lcd, SIGNAL(overflow()),
this, SLOT(handleMathError()));
connect(calculator, SIGNAL(divisionByZero()),
this, SLOT(handleMathError()));
除此之外信號可以連接到其他信號(見過的其他插槽系統似乎不大可以?)
connect(lineEdit, SIGNAL(textChanged(const QString &)),
this, SIGNAL(updateRecord(const QString &)));
需要指出的是信號信號鏈接和信號插槽連接時不同的
既然信號和插槽可以連接那么他們應該可以斷開,如下:
disconnect(lcd, SIGNAL(overflow()),
this, SLOT(handleMathError()));
一個簡單的例子:
class Employee : public QObject
{
Q_OBJECT
public:
Employee() { mySalary = 0; }
int salary() const { return mySalary; }
public slots:
void setSalary(int newSalary);
signals:
void salaryChanged(int newSalary);
private:
int mySalary;
};
void Employee::setSalary(int newSalary)
{
if (newSalary != mySalary) {
mySalary = newSalary;
emit salaryChanged(mySalary);
}
}
說明
關鍵字 public slots:和signals
他們用于修飾插槽函數和信號函數
至于信號的反射通過關鍵字 emit來實現
通過本文基本掌握了QT的信號插槽機制
QT自帶的例子Codecs是一篇關于保存和載入不同編碼文本的例子
其界面比較簡單一個簡單的單文檔而已
有2個主要的對象
一個是MainWindow用于窗體主界面
另外一個是PreviewForm用于顯示編碼格式列表
1.其編碼格式的獲取部分代碼如下:
QMap<QString, QTextCodec *> codecMap;
QRegExp iso8859RegExp("ISO[- ]8859-([0-9]+).*");
foreach (int mib, QTextCodec::availableMibs()) {
QTextCodec *codec = QTextCodec::codecForMib(mib);
QString sortKey = codec->name().toUpper();
int rank;
if (sortKey.startsWith("UTF-8")) {
rank = 1;
} else if (sortKey.startsWith("UTF-16")) {
rank = 2;
} else if (iso8859RegExp.exactMatch(sortKey)) {
if (iso8859RegExp.cap(1).size() == 1)
rank = 3;
else
rank = 4;
} else {
rank = 5;
}
sortKey.prepend(QChar('0' + rank));
codecMap.insert(sortKey, codec);
}
codecs = codecMap.values();
通過使用foreach循環來獲取支持的編碼格式并保存
不過看上去
foreach (int mib
, QTextCodec::availableMibs
())有點奇怪
查查資料
解釋是foreach(variables ,container)關鍵字是Qt對c++的一個擴展,主要用于按順序歷經容器(container)中的對象
2關于文件菜單的生成和設置
菜單的構造
一個例子
saveAsMenu
= new QMenu(tr
("&Save As"), this);這里有2個參數一個是菜單顯示文另外一個是當前窗體指針
然后就可以加載子菜單,設置分隔符,設置事件響應等操作了
例子為:
fileMenu = new QMenu(tr("&File"), this);
fileMenu->addAction(openAct);
fileMenu->addMenu(saveAsMenu);
fileMenu->addSeparator();
fileMenu->addAction(exitAct);
那如何綁定菜單到當前窗體呢
如下:
menuBar()->addMenu(fileMenu);
menuBar()->addSeparator();
menuBar()->addMenu(helpMenu);
menuBar()是QmainWindow的成員函數用于獲取窗體菜單項指針
3.QT對象QAction
QT文檔對QAction的解釋是可以抽象用戶接口對象-可以插入控件
例子如下:
openAct = new QAction(tr("&Open "), this);
openAct->setShortcuts(QKeySequence::Open);
connect(openAct, SIGNAL(triggered()), this, SLOT(open()));
無非就是對象聲明,設置快捷鍵,鏈接函數和響應而已
4.窗體設置
setWindowTitle
(tr
("Codecs"));
    resize(500, 400);

5.消息對話框
    QMessageBox::about(this, tr("About Codecs"),
            tr("The <b>Codecs</b> example demonstrates how to read and write "
               "files using various encodings."));